YUV Amplifier
 YUV Amplifier shaping independent gain, offset, and inversion across all three video channels to transform color and contrast in real time.
Overview
YUV Amplifier is a fundamental color processing tool for Videomancer. It provides independent gain (contrast) and offset (brightness) controls for each of the three YUV channels, along with per-channel inversion and a global fade control. If you think of your video signal as three separate streams of information: one for brightness and two for color: YUV Amplifier gives you a full set of knobs to shape each stream independently.
At default settings, the signal passes through unchanged. Small adjustments produce subtle color grading: warming or cooling the image, boosting contrast, or shifting the overall brightness. Larger adjustments push the image into bold, stylized territory: saturated hues, solarized tones, and inverted color fields. The fade control lets you blend any processed result smoothly toward black or white.
YUV Amplifier is a workhorse utility. Place it anywhere in a signal chain to fine-tune color balance, correct levels, or create dramatic color shifts before or after other effects.
What's In a Name?
The name is literal and descriptive. YUV refers to the color space the program operates in: Y for luminance, U for blue-difference chrominance, and V for red-difference chrominance. Amplifier describes the core function: a processing amplifier, or proc amp, that scales and shifts each channel. In broadcast engineering, a proc amp is the standard tool for adjusting video levels. YUV Amplifier brings that capability to Videomancer with per-channel precision.
Quick Start
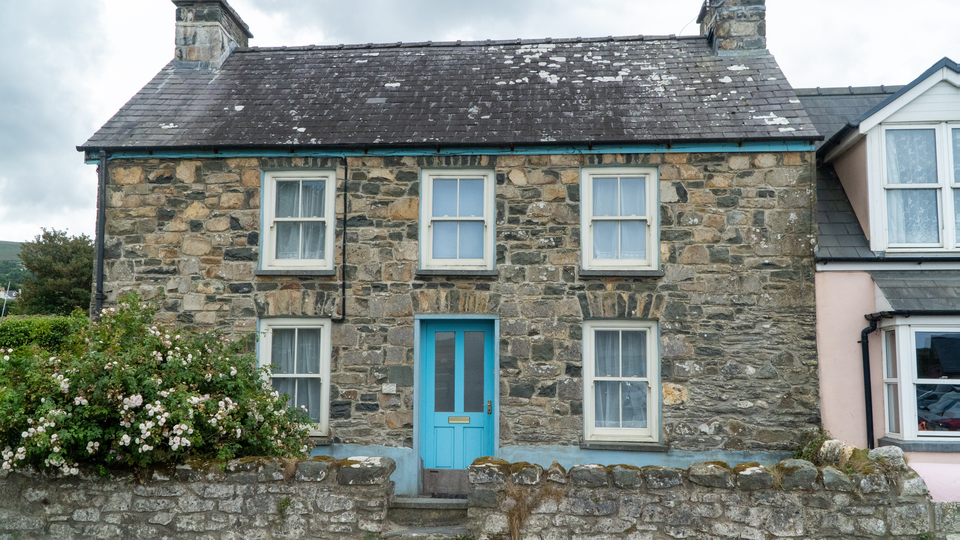
- Feed a video source into Videomancer and load the YUV Amplifier program. The image appears unchanged (all controls are at their default, unity-gain positions.)
- Turn Y Gain (Knob 1) clockwise past the midpoint. The image becomes higher contrast: brights get brighter, darks get darker. Turn it counterclockwise toward zero and the image flattens to a uniform gray.
- Toggle Y Invert (Switch 7) to On. The entire image flips to a photographic negative. Toggle it back to Off and the image returns to normal.
- Pull the Fade Amount fader (Fader 12) downward. The image gradually dissolves into black. Flip Fade Color (Switch 10) to White and the image dissolves into white instead.
Parameters
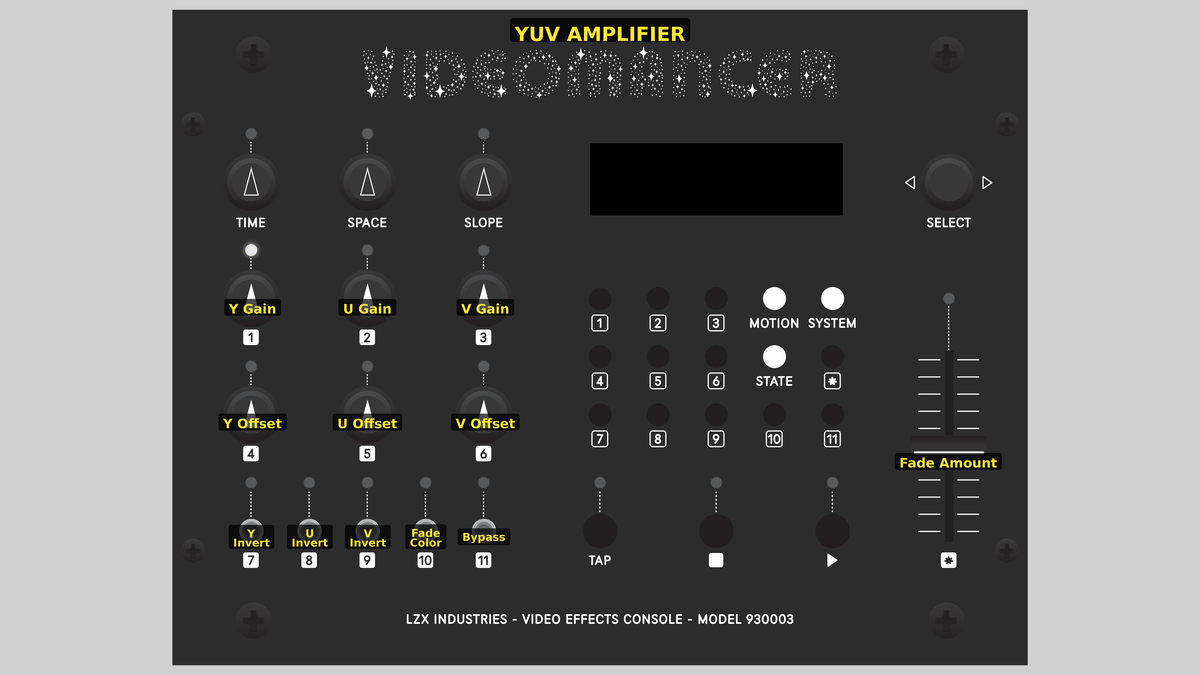 Videomancer's front panel with YUV Amplifier active. Knobs 1–6 (top two rows of left cluster), Toggle switches 7–11 (bottom row of left cluster), Fader 12 (right side).
Knob 1 — Y Gain
| Property | Value |
|---|---|
| Range | 0.0% – 200.0% |
| Default | 100.1% |
Y Gain controls the contrast of the luminance channel. It maps to the contrast input of the Y proc amp. At 0%, fully counterclockwise, all luminance detail is crushed to the offset value: the image becomes a flat field. At the default position of 100%, the signal passes with unity gain. Turning clockwise toward 200% doubles the contrast, pushing midtones apart and driving highlights and shadows toward their extremes. High gain values can clip the signal, producing hard white and black regions.
Gain is applied as multiplication around the midpoint (512). Values above midpoint are pushed higher; values below are pushed lower. The formula is: (input − 512) × gain / 512 + offset.
Knob 2 — U Gain
| Property | Value |
|---|---|
| Range | 0.0% – 200.0% |
| Default | 100.1% |
U Gain controls the contrast of the blue-difference chrominance channel. At 0%, the U channel collapses to its offset value, removing all blue-yellow color variation. At the default of 100%, the original color balance is preserved. Increasing toward 200% boosts blue-yellow saturation, making blues more vivid and yellows more intense. Because U and V are independent, you can boost blue saturation without affecting red-green tones.
Knob 3 — V Gain
| Property | Value |
|---|---|
| Range | 0.0% – 200.0% |
| Default | 100.1% |
V Gain controls the contrast of the red-difference chrominance channel. It behaves identically to U Gain but operates on the red-green axis. At 0%, red-green color differences vanish. At 100%, the image is unchanged. At 200%, reds and cyans become intensely saturated. Reducing V Gain while keeping U Gain high shifts the palette toward blue and yellow, suppressing reds and greens.
Setting both U Gain and V Gain to 0% while keeping Y Gain at 100% produces a clean monochrome image (all color is removed, leaving only luminance.)
Knob 4 — Y Offset
| Property | Value |
|---|---|
| Range | -100.0% – 100.0% |
| Default | 0.1% |
Y Offset shifts the overall brightness of the luminance channel. It maps to the brightness input of the Y proc amp. At the default of 0%, no offset is applied. Turning counterclockwise toward −100% darkens the entire image. Turning clockwise toward +100% brightens the entire image. Unlike gain, offset shifts all values uniformly: darks and lights move together. Combined with high Y Gain, offset can reposition the tonal range to expose shadow detail or recover highlights.
Knob 5 — U Offset
| Property | Value |
|---|---|
| Range | -100.0% – 100.0% |
| Default | 0.1% |
U Offset shifts the blue-difference chrominance channel. At the default of 0%, the color balance is neutral. Positive values push the image toward blue; negative values push it toward yellow. This is a global color temperature adjustment on the blue-yellow axis. Small offsets produce subtle warming or cooling effects; large offsets create strong color casts.
Knob 6 — V Offset
| Property | Value |
|---|---|
| Range | -100.0% – 100.0% |
| Default | 0.1% |
V Offset shifts the red-difference chrominance channel. At the default of 0%, the color balance is neutral. Positive values push the image toward red and magenta; negative values push it toward green and cyan. Combined with U Offset, you can target any hue: positive U and positive V yields magenta, negative U and positive V yields red, and so on.
Adjusting U Offset and V Offset together is equivalent to a white balance correction. Small shifts can compensate for the color temperature of a light source, matching the look between different cameras or scenes.
Switch 7 — Y Invert
| Property | Value |
|---|---|
| Off | Off |
| On | On |
| Default | Off |
Y Invert flips the luminance channel by applying a bitwise complement. When set to On, every pixel's brightness is reversed: black becomes white and white becomes black, producing a photographic negative effect on the luminance. Inversion is the first processing step: it happens before gain and offset are applied, so all downstream processing operates on the inverted signal. This means Y Gain and Y Offset will amplify and shift the inverted values.
Switch 8 — U Invert
| Property | Value |
|---|---|
| Off | Off |
| On | On |
| Default | Off |
U Invert flips the blue-difference chrominance channel. When set to On, blue tones become yellow and yellow tones become blue. Like Y Invert, this occurs before the U proc amp, so U Gain and U Offset operate on the inverted signal. Combining U Invert with V Invert produces a full chroma inversion (all hues rotate by 180 degrees on the color wheel.)
Switch 9 — V Invert
| Property | Value |
|---|---|
| Off | Off |
| On | On |
| Default | Off |
V Invert flips the red-difference chrominance channel. When set to On, red tones become cyan and cyan tones become red. This is the complement operation on the red-green axis. Enabling V Invert alone creates a color-shifted palette where warm tones become cool and cool tones become warm, while blue-yellow relationships remain unchanged.
Switch 10 — Fade Color
| Property | Value |
|---|---|
| Off | Black |
| On | White |
| Default | Black |
Fade Color selects whether the fade target is black or white. When set to Black, reducing Fade Amount blends the Y channel toward zero (black) and the U and V channels toward neutral. When set to White, reducing Fade Amount blends the Y channel toward maximum (white) while U and V still fade toward neutral. In both cases, chrominance fades to gray (only the luminance target changes.)
Because U and V always fade toward 512 (neutral gray), a full fade to black produces a true black frame, while a full fade to white produces a clean white frame. Neither introduces a color cast at full fade.
Switch 11 — Bypass
| Property | Value |
|---|---|
| Off | Off |
| On | On |
| Default | Off |
Bypass routes the unprocessed input signal directly to the output, skipping all gain, offset, inversion, and fade processing. Sync timing is still aligned through the delay pipeline, so switching Bypass on and off does not cause a glitch or sync disruption. Use Bypass for instant A/B comparison between the raw input and your processed result.
Fader 12 — Fade Amount
| Property | Value |
|---|---|
| Range | 0.0% – 100.0% |
| Default | 100.0% |
Fade Amount controls the blend between the processed signal and the fade target color. At the default of 100%, fully up, the processed signal passes through with no fading. As you pull the fader toward 0%, the image progressively dissolves into the color selected by Fade Color. At 0%, the processed signal is completely replaced by the fade target (a solid black or white frame.)
Fade Amount is a wet/dry mix for the entire program. Use it as a performance control to smoothly blend between your processed look and a solid color, or to dial back the intensity of extreme gain and offset settings without changing them individually.
Background
The YUV Color Space
Video signals encode color as three separate channels. Y (luminance) carries brightness information: it is the grayscale version of the image. U and V (chrominance) carry color difference signals: U encodes the blue-versus-yellow axis, and V encodes the red-versus-cyan axis. This separation is not arbitrary; it reflects human vision, which is far more sensitive to brightness detail than to color detail. By splitting the signal this way, each channel can be processed, compressed, or transmitted independently.
In Videomancer's 10-bit YUV 4:4:4 format, each channel spans 0 to 1023. For luminance (Y), 0 is black and 1023 is white. For chrominance (U and V), 512 is the neutral center point: no color difference. Values above 512 push toward blue (U) or red (V); values below 512 push toward yellow (U) or cyan (V).
The Proc Amp
A processing amplifier applies two operations to a signal: gain (multiplication) and offset (addition). Gain controls the contrast: how far values spread from the center point. Offset controls the brightness: shifting all values uniformly up or down. The mathematical formula is:
output = (input − 512) × gain / 512 + offset
When gain is at unity (512) and offset is at zero (512), the output equals the input. This two-parameter model is the foundation of all video level correction, from subtle color grading to aggressive signal manipulation.
Inversion and Complement
Each channel can be independently inverted before entering the proc amp. Inversion applies a bitwise complement: each bit is flipped from 0 to 1 or 1 to 0. For a 10-bit value, this transforms value n into 1023 − n. The result is a mirror image of the tonal range. Because inversion happens before the proc amp, the gain and offset stages operate on the inverted signal, which means their behavior is reversed relative to the source.
Signal Flow
Signal Flow Notes
All three channels share the same pipeline structure: inversion, proc amp, and fade interpolation. The three channels are processed in parallel: they are three independent instances of the same circuit running simultaneously. The only cross-channel interaction is the Fade Color toggle, which sets the Y fade target to black (0) or white (1023) while U and V always fade toward neutral (512).
The proc amp stage dominates the pipeline at 9 clock cycles. Gain and offset are applied in a single compound operation: the input is centered around 512, scaled by the gain value, and then shifted by the offset value. The output is clamped to the valid 0–1023 range, preventing wraparound artifacts.
The total pipeline delay is 16 clock cycles (1 + 9 + 4 + 1 + 1 for sync alignment), which is evenly divisible by 4 as required by the video timing architecture.
Exercises
These exercises explore independent channel control, from basic brightness and contrast adjustment to creative color manipulation and performance fading.
Exercise 1: Brightness and Contrast
 Brightness and Contrast — simulated result across source images.
Exercise Illustration
A description of the exercise illustration.
Learning Outcomes
Learn how gain and offset interact to shape the luminance of an image.
Key Concepts
- Gain controls contrast (spread around center)
- Offset controls brightness (uniform shift)
- High gain amplifies the effect of offset changes
Video Source
A camera feed or recorded footage with a mix of highlights, midtones, and shadows.
Steps
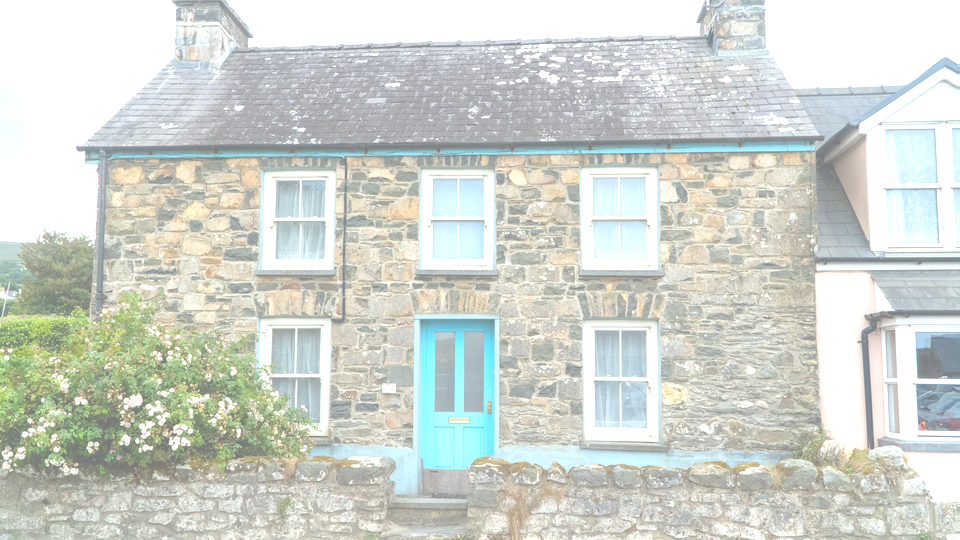
- Boost contrast: Turn Y Gain (Knob 1) clockwise to about 150%. The image becomes punchier (shadows deepen and highlights brighten.)
- Lift shadows: Now turn Y Offset (Knob 4) clockwise. The entire image brightens, revealing shadow detail. Notice that with high gain, the offset shift is more dramatic.
- Crush blacks: Turn Y Offset counterclockwise past center. Shadows collapse to solid black while highlights remain visible. This is a classic broadcast "setup" adjustment.
- Flat gray: Turn Y Gain counterclockwise to about 10%. The image collapses to a narrow band of grays near the offset value, regardless of content.
- Recover: Return both controls to center (100% gain, 0% offset). The image returns to its original appearance.
Settings
| Control | Value |
|---|---|
| Y Gain | ~150% |
| U Gain | 100% |
| V Gain | 100% |
| Y Offset | +25% |
| U Offset | 0% |
| V Offset | 0% |
| Y Invert | Off |
| U Invert | Off |
| V Invert | Off |
| Fade Color | Black |
| Bypass | Off |
| Fade Amount | 100% |
Exercise 2: Color Temperature Shift
 Color Temperature Shift — simulated result across source images.
Exercise Illustration
A description of the exercise illustration.
Learning Outcomes
Use chrominance offset and gain to create warm and cool color grades.
Key Concepts
- U Offset shifts blue-yellow balance
- V Offset shifts red-cyan balance
- Combined offsets target any hue on the color wheel
Video Source
Footage with neutral tones (skin tones, gray walls, or daylight scenes work well.)
Steps
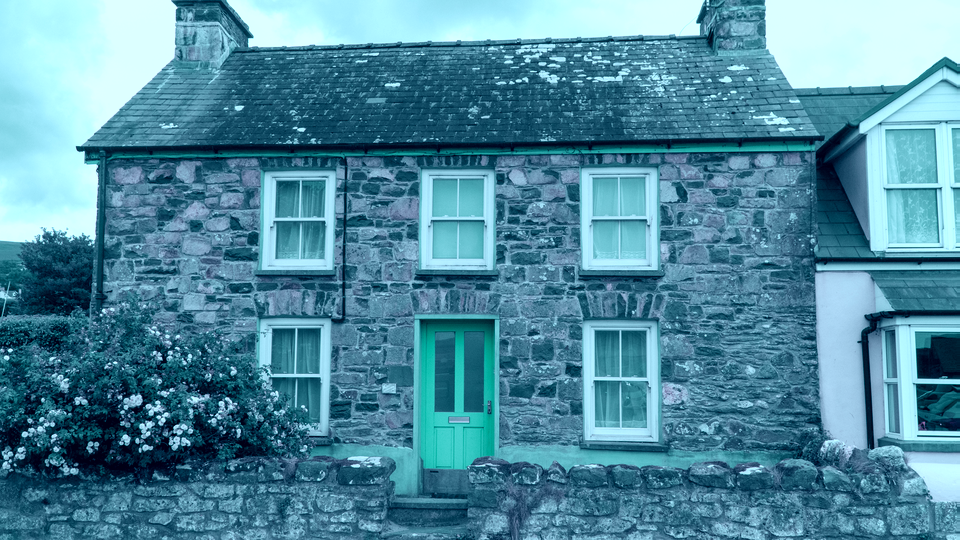
- Cool shift: Turn U Offset (Knob 5) clockwise to about +30%. The image takes on a cool, bluish cast.
- Warm shift: Return U Offset to center, then turn V Offset (Knob 6) clockwise to about +30%. The image shifts warm (reds and magentas appear.)
- Golden hour: Set U Offset to about −20% and V Offset to about +15%. The combination of reduced blue and boosted red creates a warm, golden look.
- Desaturate: Reduce both U Gain (Knob 2) and V Gain (Knob 3) to about 50%. Colors become muted and pastel. At 0% for both, the image is monochrome.
- Oversaturate: Push both U Gain and V Gain to 180%. Colors become vivid and almost electric. The image takes on a stylized, hyper-real quality.
Settings
| Control | Value |
|---|---|
| Y Gain | 100% |
| U Gain | 100% |
| V Gain | 100% |
| Y Offset | 0% |
| U Offset | −20% |
| V Offset | +15% |
| Y Invert | Off |
| U Invert | Off |
| V Invert | Off |
| Fade Color | Black |
| Bypass | Off |
| Fade Amount | 100% |
Exercise 3: Inverted Fade Performance
 Inverted Fade Performance — simulated result across source images.
Exercise Illustration
A description of the exercise illustration.
Learning Outcomes
Combine channel inversion with the fade control for dramatic, performable color effects.
Key Concepts
- Per-channel inversion creates complementary color shifts
- Fade Amount acts as a global wet/dry mix
- Fade Color changes the dissolve destination
Video Source
Any video source (high-contrast material with strong colors works best.)
Steps
- Negative image: Toggle all three invert switches: Y Invert, U Invert, and V Invert: to On. The image becomes a full photographic negative: all tones and hues are reversed.
- Partial fade: Pull Fade Amount (Fader 12) down to about 50%. The negative image blends halfway toward black, creating a dark, eerie half-tone.
- White fade: Flip Fade Color (Switch 10) to White. The same negative image now blends toward white (a ghostly, washed-out appearance.)
- Selective inversion: Turn off Y Invert and leave U Invert and V Invert on. The brightness returns to normal, but all colors are complementary (blues become yellow, reds become cyan.)
- Perform: Slowly sweep Fade Amount from 0% to 100% while toggling invert switches. The image transforms fluidly between solid color, inverted, and processed states.
Settings
| Control | Value |
|---|---|
| Y Gain | 100% |
| U Gain | 100% |
| V Gain | 100% |
| Y Offset | 0% |
| U Offset | 0% |
| V Offset | 0% |
| Y Invert | On |
| U Invert | On |
| V Invert | On |
| Fade Color | White |
| Bypass | Off |
| Fade Amount | ~50% |
Glossary
-
Bitwise Complement: Flipping every bit in a binary number; for a 10-bit value n, this produces 1023 − n.
-
Chrominance: The color-difference components (U and V) of a YUV video signal, encoding hue and saturation independently of brightness.
-
Gain: Multiplication applied to a signal, controlling how far values spread from the center point. Unity gain (1×) leaves the signal unchanged.
-
Interpolator: A circuit that computes a weighted blend between two values based on a mix parameter t.
-
Luminance: The brightness component (Y) of a YUV video signal, representing perceived lightness on a scale from black to white.
-
Offset: A uniform shift applied to all values in a channel, raising or lowering the entire signal without changing its spread.
-
Processing Amplifier: A gain-and-offset circuit that adjusts the contrast and brightness of a video channel. Abbreviated as "proc amp."
-
Unity Gain: The gain setting at which the output equals the input: no amplification or attenuation. In YUV Amplifier, this corresponds to 100% (register value 512).
-
Wet/Dry Mix: A blend control between a processed signal (wet) and an unprocessed or reference signal (dry).
-
YUV: A color space that separates video into luminance (Y) and two chrominance channels (U for blue-difference, V for red-difference).